How to make a Magic Dashboard
Introduction
This guide will show you how to install the Magic Mirror software on a Raspberry Pi Zero W to make a useful dashboard which you can access from any computer in your house (or wherever you set this up). This guide assumes that you know the basics of Linux, though I believe it’s still possible to follow this even as a complete beginner. Use this guide in conjunction with my Youtube video.
Note: for this project, I wasn’t able to run the MagicMirror site on the Pi Zero W connected to a monitor with the included Chromium browser as it ran too slow for my liking. Therefore, you’ll need a separate computer to connect from to get to the MagicMirror site and it’ll run much better. If you did, however, want to run the Pi connected to a monitor, just use a Raspberry Pi 3 or 4 (4 is kind of overkill) instead of the Pi Zero W, the instructions below will still apply.
Another note: This guide is heavily borrowed from this guide, though there are some differences in the major goals between our guides.
Parts Required
- A Raspberry Pi Zero W ($25)
- A 5.0V - 2.5A power supply (~$10)
- Note: I bought a Raspberry Pi Zero W Kit (~$28), which came with a case, heatsink, mini HDMI adapter, and other useful parts. This option will makes more sense than buying the parts separately because the price difference is miniscule between buying the board and this complete kit.
- An SD card reader (~18)
- Note: You can get cheaper SD card readers but this one is useful for other things because it has additional USB ports.
- A monitor
- A separate computer
Optional Parts
- Mini HDMI to HDMI adapter
- This part is needed for the Raspberry Pi Zero in order to connect to a regular HDMI display so you can add the WiFi configuration via the desktop GUI. This part is not needed if you use add the WiFi configuration to the boot files on the SD card prior to boot up
Software Required
- SD Card Formatter
- For formatting your SD card
- Etcher
- For installing the image on the SD card
- Raspberry Pi Raspbian Buster with Desktop image
- Note: I believe you can install MagicMirror with the Raspbian Buster Lite image, which I think would make it run a little bit faster, though I haven’t tested this.
- PuTTy
- An SSH client for connecting to the Pi
- Note: If you’re using a Mac, you can connect to the Pi using
ssh pi@<PiIPAddress>
- (Optional) WinSCP
- An FTP client for transferring files to the Pi
- Note: You can use this to transfer configuration files directly to the Pi rather than having to create and edit files on the Pi with
vim, nano, or other Linux text editors. Install this if you’re uncomfortable in a Linux terminal.
Installation
- Plug the SD card into your SD card reader
- Format your SD card with SD Card Formatter
- Flash the Raspberry Pi Raspbian Buster with Desktop image to your SD card with Etcher
- (Optional Step) If you don’t have a Mini HDMI to HDMI adapter or if you don’t want to configure the Pi via the desktop GUI (i.e., a purely “headless” setup), you will want to add a couple of network configuration files to the
/boot folder (accessible after you flash the image to the SD card) so that the Pi can connect to your network:
- (1)
wpa_supplicant.conf - the WiFi network configuration file
- (2)
ssh - the SSH configuration file
- This file can just be an empty file named
ssh; it basically just tells the Pi that it should turn on the SSH configuration so that you can remotely connect to it
- Plug in the SD card to the Raspberry Pi, connect it to a monitor, then power it on
- Note: If you set up SSH, connect to the Pi via SSH (using PuTTy for Windows or Terminal for MacOS)
Setup and Basic Configuration
- Configure basic settings
- Change Localisation Options
- Change Locale
- Change timezone
- Change keyboard layout
- Change WiFi Country
- Boot Options
- (Optional) If you didn’t upload the
ssh on initial install, enable SSH in Interface Options
- Change password
- (Optional) If you just enabled SSH access, connect to the Pi via SSH now.
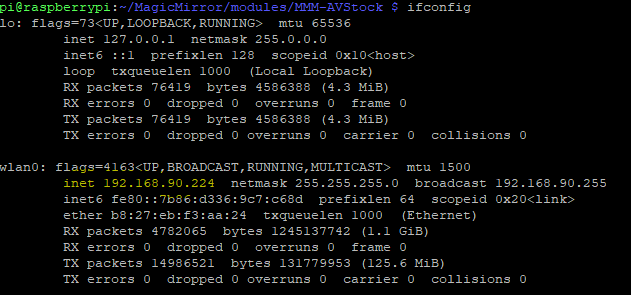
- To find the IP address to connect to, run
ifconfig (picture) on the Pi directly or use an IP scanner to find it.
- Install OS & software updates
sudo apt update && sudo apt upgrade
- Install software
- Node.JS (old version that is compatible with Pi Zero)
sudo wget https://nodejs.org/dist/v10.16.0/node-v10.16.0-linux-armv6l.tar.xztar xvf node-v10.11.0-linux-armv6l.tar.xzcd node-v8.3.0-linux-armv6lsudo cp -R * /usr/localsudo reboot
- Node Package Manager (used for installing components for MM modules)
- Git (for downloading and updating MM modules)
- MagicMirror (the software this is all based on!)
cd ~/git clone https://github.com/MichMich/MagicMirrorcd MagicMirrornpm install -arch=armv7l
- Note: If you get an error, delete
/home/pi/MagicMirror/node_modules by using sudo rm -rf /home/pi/MagicMirror/node_modules and try npm install
- Vim (Text editor)
- Other tools for displaying the MagicMirror
sudo apt install chromium-browsersudo apt install xinitsudo apt install xorgsudo apt install matchboxsudo apt install unclutter
- Create startup scripts
- Note: You can create these files outside of the Pi and transfer them to your Pi using WinSCP. Otherwise, you can create them directly:
sudo vim mmstart.sh
- mmstart.sh
#!/bin/bash
cd ~/MagicMirror
node serveronly &
sleep 30
xinit /home/pi/chromium_start.sh
sudo vim chromium_start.sh
- chromium_start.sh
#!/bin/sh
unclutter &
xset -dpms # disable DPMS (Energy Star) features.
xset s off # disable screen saver
xset s noblank # don’t blank the video device
matchbox-window-manager &
chromium-browser --incognito --kiosk http://localhost:8080/
- Allow files to be executed
sudo chmod a+x mmstart.shsudo chmod a+x chromium_start.sh
- Create automatic startup
cd ~sudo npm install -g pm2pm2 startuppm2 start /home/pi/mmstart.shpm2 save
- To restart the MagicMirror service,
MagicMirror Configuration
- Networking
- Allow your computer to connect to the Pi
- In
~/MagicMirror/config/config.js (either use vim or nano to edit directly or WinSCP to transfer the file here),
var config = {
  address: "<yourPiIP (use ifconfig)>"
  port: 8080,
  ipWhitelist: ["<yourPiIP>", "<yourComputerIP (use ipconfig for Windows or ifconfig for Mac)>"]
}
- Important: Whenever you edit the
config.js file, you’ll need to restart the MagicMirror software
pm2 restart mmstart
- Note: I’ll provide my full
config.js file at the end of this guide
- To connect to the dashboard, open a web browser and type the following into the address bar:
http://<PiIPAddress>:8080- If your MagicMirror doesn’t come up, you have a problem with your networking or the MagicMirror software isn’t started
- Note: You should open the browser in Private or Incognito mode because I’ve found that in Firefox, it saves tons of trash data into the Firefox profiles folder if you don’t which will quickly fill up your drive space.
- Installing Modules
- Click here for a list of all MagicMirror 3rd party modules
- The 3rd party modules that I chose to use were:
- MMM-MicrosoftToDo - a module to integrate your MS ToDo lists
- MMM-SmartWebDisplay - a module you can use to display web pages in an embedded frame (I used this to display my security camera feed)
- on-this-day - a module for displaying a random thing that happened sometime in the past on this day
- MMM-BackgroundSlideshow - a module to display a picture in the background of the dashboard
- MMM-AVStock - a module used to display stock prices
- To install modules, enter your
modules folder
cd /home/pi/MagicMirror/modules
- Clone the Github repository for the module you want to install
git clone <https://github.com/<module>- e.g.,
git clone https://github.com/lavolp3/MMM-AVStock
- Install dependencies for any Node components in the module
cd <module>- e.g.,
cd MMM-AVStock
npm install
- Configuring Modules
- After installing, you’ll need to edit the
config.js file accordingly
- The recommended configuration settings are usually included in the Github repository README file
- Edit the
config.js file
vim /home/pi/MagicMirror/config/config.js
- Add any module configuration into the file, following the configuration structure
- For example,
{
  //disabled:true,
  module: "MMM-AVStock",
  position: "top_right",
  config: {
 apiKey : "YOUR_ALPHAVANTAGE_KEY",
 symbols : ["aapl", "GOOGL", "005930.KS"],
  }
},
- After finished with editing the file, restart the MagicMirror software
- Troubleshooting
- Developer Tools is your friend
- You can use developer tools to find syntax errors in the
config.js file or to just figure out what a module is doing
- Right click on the webpage, Inspect Element, then open the Console tab
My MagicMirror config file
As promised, here’s my MagicMirror config file (with personal information stripped). Hope that it helps you!
config.js